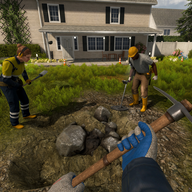
Ore Factory Squad Mining Guide: Dig Smarter
Ore Factory Squad mining guide for tunnel direction, detector use, layer clearing, tool timing, lifts, crates, and safer dynamite.
Mine With a Target
Ore Factory Squad mining guide advice starts with a target product. The official Steam page says each property has procedurally generated underground resources with no fixed paths, and it also says resources become more valuable as players go deeper. That combination means a static ore map would be unreliable. The right habit is to mine toward the next factory or contract need, then adjust when the property reveals a better resource pocket.
Before entering a property, decide what the factory is missing. If the contract line needs one raw resource, dig for that material and return before inventory turns into a mixed pile. If the factory is not waiting for a specific input, use the trip to open a practical tunnel, check layers, and mark where valuable material appears. Mining without a warehouse question creates extra hauling and stock confusion later.
| Mining question | Good answer | Bad answer |
|---|---|---|
| What do we need? | A named input for an active machine or contract | "More ore" with no destination |
| Where do we dig? | A route that can be repeated or extended | A random branch that cannot be found again |
| When do we return? | Before tools, inventory, or lift flow slows the team | After every pocket becomes a mixed load |
| What changes next? | Tool upgrade, lift use, or property purchase | Digging deeper just because deeper sounds better |
Sources used for this page are the official Steam listing https://store.steampowered.com/app/4210580/Ore_Factory_Squad/, the advanced tips transcript https://www.youtube.com/watch?v=1ytzBkHV6qE, and the mining lift transcript https://www.youtube.com/watch?v=h1PGQ4OPZ8k.
Tools and Layers
The official feature list names shovel, pickaxe, jackhammer, and explosives. Treat that list as a progression ladder for effort, not as a reason to use the loudest tool on every block. Start with the tool that clears the current layer predictably. Move to stronger equipment when the old tool wastes time, blocks access to deeper value, or prevents a contract input from arriving on schedule.
Explosives should clear planned sections, not erase navigation. Because the underground is procedural, a careless blast can make a route harder to read or strand valuable material behind rough edges. Use dynamite when the area is already understood: a wall that must open, a large section that can be safely cleared, or a route that needs a wider access point for repeated hauling.
| Tool stage | Evidence-backed role | Player rule |
|---|---|---|
| Shovel | Starting tool for early digging | Use for easy material and route shaping |
| Pickaxe | Tougher layers after the start | Switch when shovel work becomes slow |
| Jackhammer | Faster clearing once unlocked | Use on repeated paths or larger pockets |
| Explosives | Large-section clearing | Reserve for planned openings, not blind searching |
Do not spend upgrade money only because a tool is available. Compare the cost to the route it improves. A jackhammer is more valuable when it opens a repeated resource path than when it saves a few seconds on a one-time side branch. The same rule applies to property expansion: a new location is useful when it offers resources your factory can process.
Hauling and Lift Flow
Mining profit is limited by hauling as much as digging. The Steam page identifies logistics and transport through pallets, forklifts, and vehicles, while the collected mining lift video specifically supports Mining Lift logistics. Use the lift as a movement answer: it should reduce repeat climbs, shorten trips from deeper pockets, or connect a productive layer to the warehouse flow.
Place the lift around a route you have already proven. If you drop it before knowing where resources appear, it may anchor the team to a poor tunnel. First scout, then establish a repeat path, then use the lift to make that path less tiring. After placement, test one full trip from resource pocket to factory intake. If the lift saves time but the warehouse still cannot process the material, the mining route is ahead of the factory.
| Lift test | Pass condition | Fix if it fails |
|---|---|---|
| Access | The miner reaches the productive layer quickly | Move the dig route or clear a wider approach |
| Carry | Material returns without repeated backtracking | Stage crates or adjust the tunnel shape |
| Factory feed | Returned material enters a machine or stock zone | Coordinate with the factory lead before deeper mining |
| Contract use | The mined input becomes a requested product | Change target material or delay that contract |
For solo players, hauling pressure is harsher because the same person mines, carries, processes, and loads. Keep trips smaller and more intentional. A co-op squad can assign one miner and one transporter, but the mine lead still needs to report what is being collected.
Property Decisions
Properties are not just new scenery. The official page names small backyards, big construction sites, forest areas, and large quarries on snowy mountains as examples of property environments, while also stating that distribution is randomized. That supports a buying rule: purchase or revisit a property because it serves a resource need, a depth target, or a route experiment, not because a guide claims a fixed spawn.
When comparing properties, record what the current factory can use. A small property that feeds active contracts may be better than a deeper property full of resources you cannot process yet. Once new licenses or machines open, the value changes. The advanced tips evidence about offsite workers also suggests that remote collection can change priorities later, because workers may supply basic resources while the player focuses on more complex production.
| Property state | Mine it now | Wait or scout later |
|---|---|---|
| Early backyard | Needed basics, simple haul route | Current stock already covers contracts |
| Construction site | Factory can process the available material | Machines are still missing |
| Forest area | Offsite or repeated collection supports the economy | Travel time beats the resource gain |
| Quarry or mountain | Deeper value matches unlocked tools and lines | Depth outpaces hauling and processing |
The better mining question is "what will this trip unlock?" It might unlock a contract, a machine test, a tool upgrade, or enough surplus to stabilize cash. If the answer is only a bigger mixed pile, return to the warehouse and repair the production chain.
Recovery Checks
If mining feels slow, isolate the bottleneck. Check the route first, the tool second, hauling third, and factory demand fourth. A poor route makes every tool feel weak. A weak tool makes every layer feel unfair. Bad hauling makes a good pocket feel worthless. Missing factory demand makes any mining trip look profitable until the warehouse clogs.
Do not promise exact ore depth, fixed layer rewards, or permanent best routes. Ore Factory Squad is built around procedural mining and post-launch updates can change balance. The page can still give a strong answer: mine for the resource your next machine or contract needs, keep routes repeatable, use stronger tools when the layer proves it, and add lift support after the path is known.
The concrete mining facts supported by the evidence are procedurally generated underground resources, shovel, pickaxe, jackhammer, and explosives, resources become more valuable, conveyor-based production system, and Mining Lift logistics. A practical player route connects all five. Start with the procedural assumption that every property needs scouting. Choose the tool that matches the layer. Decide whether deeper value is worth the longer haul. Return material to a conveyor-ready intake or machine zone. Add the lift only when the same deep path will be used again.
For squads, give the miner permission to say no. If the contract runner requests an item that the current property is not supplying, the miner should report that quickly instead of wandering deeper in hope. If the factory lead says a conveyor-based production system is backed up, the miner should slow collection or switch to the missing input. Mining is not separate from the warehouse economy; it is the first stage of every processed product.
For solo runs, write a small return rule. Come back when the carried material answers the current factory question, when the route becomes hard to remember, or when the tool is clearly too weak for the layer. That rule keeps the save moving through mining, processing, and income instead of spending an entire day underground with no finished output.
Use landmarks that survive your own digging. A straight access tunnel, a widened turn, a lift position, or a staged crate is more reliable than remembering "left after the valuable pocket" once the terrain changes. When a property begins to sprawl, stop expanding side branches and improve the route back to intake. The best mining path is the one the next trip can repeat quickly with the right tool and enough space to bring useful material home.
FAQ
What is the best Ore Factory Squad mining guide rule for new players? Mine toward a specific factory input or contract product, then stop before the load becomes an unsorted warehouse problem.
Should I dig deeper as soon as possible? Dig deeper when your tools, hauling route, and processing line can use the better resource value.
When should I use the Mining Lift? Use it after you identify a repeated deep route that wastes time on travel or hauling.